So it really didn’t take too long to find the short comings of my first A/V test box that I did a couple weeks ago. Though it worked well and had a lot of good features for using a variety of different input methods, what it didn’t do was what I needed it for with the project at hand. The system I’m currently working on is a PAL Nintendo 64, which means the system was made for a region that has a 50 hertz cycle. Well, we in the US use 60 hertz and if the screen that you are using is looking for 60, it’s not gonna work out too well. Basically, the screen didn’t have an auto switch from PAL to NTSC.

On top of this, the only input the first tester had for composite required an RCA jack, which meant you had to terminate the test leads to even use it. Again, another pain. So it seemed a new solution was needed, and this one is a great deal simpler than the original and is much more conducive to my work space and projects.

Utilizing a 3.5″ TFT display, this screen has an auto PAL/NTSC switch which recognizes what region mode it’s in and makes the change accordingly. This still uses RCA inputs for those situations that would benefit from having them, but the primary Input method is now a 4-pin screw terminal. This makes testing much easier and faster as there is no longer a need to terminate the leads. So less is a great deal more in this case and I’m happy with the second version as well!

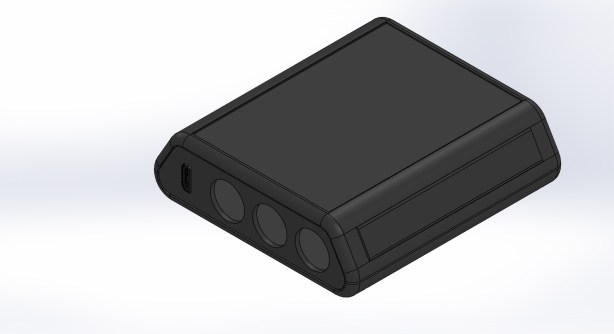
As for my commission, this weekend was very productive, getting the back half of the cases painted and sealed and almost getting the breakout box’s design complete. As stated before, this is going to be the most complete N64 project I’ve ever done and most likely the most beautiful. The case work including the 3D print time is probably pushing 30 hours, but it looks sharp! Very happy with it so far and I’ll post some more pics as I get them. But for now, here’s a couple 3D renders of the BOB. More updates soon!

Hesline BOB Render 1

Hesline BOB Render 2

Last night I finished off a small side project that I’ve been wanting to do for awhile. Though not a complex project or visually remarkable, this new tool will help out a lot in the future as I dive into new systems and try new things with the old. So yes, I basically just made myself a 3D Printed TV to mount on the wall in front of my work bench.

20160603_204051

20160604_104205

The screen itself is a 5.6″ 4:3 Ratio 480p screen which plays nicely with older consoles and since older is what I’m usually working on, it seemed the logical choice. (plus I that’s all I had to work with anyway). A good benefit though is this can take VGA and HDMI input as well as composite so there’s a wide range of possible uses for this. The bummer though is this screen board did not have audio output, so anything HDMI will be a pain to test audio with. However, there is an L&R input for composite or VGA (or anything audio for that matter) to goes to one of RDC’s original SmaIIamp boards, which in turn power the speakers. I had to add a 5V step down reg though as the reg on the screen had 1.3V, 3.3V and 12V…pretty useless as far powering an amp that requires 5V to run. Oh well, had a few spares kicking around to I used one of them up.

20160603_203438

20160604_091150So again, all in all, not a very complicated project but hopefully a useful one. This took probably 3 hours to design, 8 hours to print and 4 hours to wire & assemble and has probably $120 worth of parts and materials. So all in all, not that bad…could have bought one for cheaper I’m sure, but where’s the fun in that?

Next, an update on my current N64 Commission. It’s moving along, though a bit slower due to the above project as the test box was/is needed for the systems completion. The front half is just about complete though, but I decided that the tact switch board for the screen and audio controls needed to be made into a real PCB as well and those are currently at the fab shop getting produced.

20160528_115537

20160528_190447

Now the back halves need the same loving attention. Currently they are sitting on my desk covered in filler that needs to be sanded, refilled, sanded, primed, sanded primed, painted and clear coated…with a few more sanding in there somewhere. But yeah, that’s where things stand right now and I hope to start work on this again very shortly. Thanks for checking in!


Wow, almost 3 months without a post! Sorry guys! On top of the usual “Life” excuse, I’ve been extremely busy at work in the basement on several projects and being slightly overwhelmed in the process if I must say so myself. But things are good. Last month I finished off the N64 Kit I’d been working on and sent it on its merry way to Dubai. This had been the project the furthest away I’d ever shipped, until last week when I took on a full N64p commission to a buyer in the Land Down Under. So yes, I’m now in the works of a portable commission that will be headed for Australia once completed. I know I’ve said it before, but the Internet is an amazing thing that allows people from all corners of the planet to see and even better, commission, my work and there’s a fair bit of pride a feel for these requests.

On the subject of pride, the very first STL (3D Model) that I made available for download a few months ago has turned itself into a finished project and I gotta say that I’m very impressed and excited by the outcome! A fellow modder under the cap of [The Mod Shop] asked me several months ago if I had shared the STL files for my latest N64p at the time. I’d never really shared any files before, not necessarily because I was worried about being ripped off, but mostly because every case I’ve ever done was designed specifically for certain components. Sharing a file meant that whoever downloaded it would have to find pretty much exactly what I used to make it work and to me that seemed like a headache of constant email inquires on how I did this, or what did I use for that. But with this one, I figured what the hell. Let’s see if it survives when thrown into the wolf pit.

Well, not only did it survive, but [Mod Shop] took it a step further, utilizing some of the same parts that I used [thanks to RDC] as well as adding some aesthetic qualities that I have yet to try, like vinyl decals. The results are impressive and I would recommend taking a look into his craftsmanship!

Anyway, check out the video below and in the near future, I’ll be making some pretty big updates and announcements, should I find the time to actually devote to completing them!

20160213_122128

This is turning into a very busy start to 2016 and I’m loving every moment of it! On top of the Geneboy 3 that I’m currently working on, I took on a new project that I’ve technically not done before. As the title implies, I’m in the process of putting together an all inclusive kit for a portable N64 similar to my most resent N64 that was sent to the UK. However, this is an another amazing fact, that this will be shipping off to Dubai when it’s complete. A world wide reach is a pretty amazing thing to have access to these days and it’s opening up some pretty neat opportunities as far as a modding market is concerned.

Anyway, that being said, this kit is will have everything the buyer needs to build a fully functional N64p. It won’t be finished or polished like a full blown system would be, that will be up to the buyer to complete, but all the hardware will be included and for things like the audio amp that needs to be populated with components, they will be pre-done so all they have to do is wire it up.

However, this means that Guide for this particular system will need to be made and though most of the wiring and general N64 knowledge is out there, knowing how to apply it to this kit will be essential in the future if more kit orders come through. So that’s in the making as well. Very busy times it seems, but every little bit helps in building the shop up a bit more.

Geneboy 3 - Full Body Assembly

Yeah, that didn’t take very long on the heels of my last project, but for the past month or so now I’ve been working on the design of the third version of the Geneboy Sega Genesis Portable. This originally started out as a commission but unfortunately the buyer had to back out. But, since I’m already this far into it, I decided to keep going and will put this on ebay when it’s complete.

I’m also doing a build log on this one over on ModRetro which clicking the pic will take you too. The project is just about ready to start the finish case work and then assembly to follow. This one is going pretty quickly and I’m very happy with how well the 3D printed case halves came out and fit together. It’s going to be a pretty sweet looking unit once it get’s painted up.

So expect a few more updates on this guy as I hope to have it complete over the next couple of weeks as time allows.

Alright, so I’m pleased to annoucne the SG-N64 is now For Sale on Ebay. This went live at 3AM this morning and already has a bid which is a very encouraging sign!

I also made my 3D Printed files for the system available online at My Mini Factory. So if anyone is interested in downloading and giving this system a rip, feel free to give it a shot!

But with the coming sale of the SG-N64, I was able to finally order my new CNC driver which is what I’ve needed to get my big machine working again. Rather than pretend I know what I’m doing in the future, I’ve opted for the tried and tested, all-in-one package that even though is more money, will actually work the way the machine was intended.

The GeckoDrive G540 shown below is an example of what I’ve ordered. This takes the guess work out of single drivers and three step USB conversions to just a single interface for all 3 and run by the parallel port like my old system. I can’t wait for this to come in so I can finally….finally get my shop back up and running again! I do have a couple projects I’m still working on and requests have started to come over on the new RFQ page, so things are moving forward!

g540