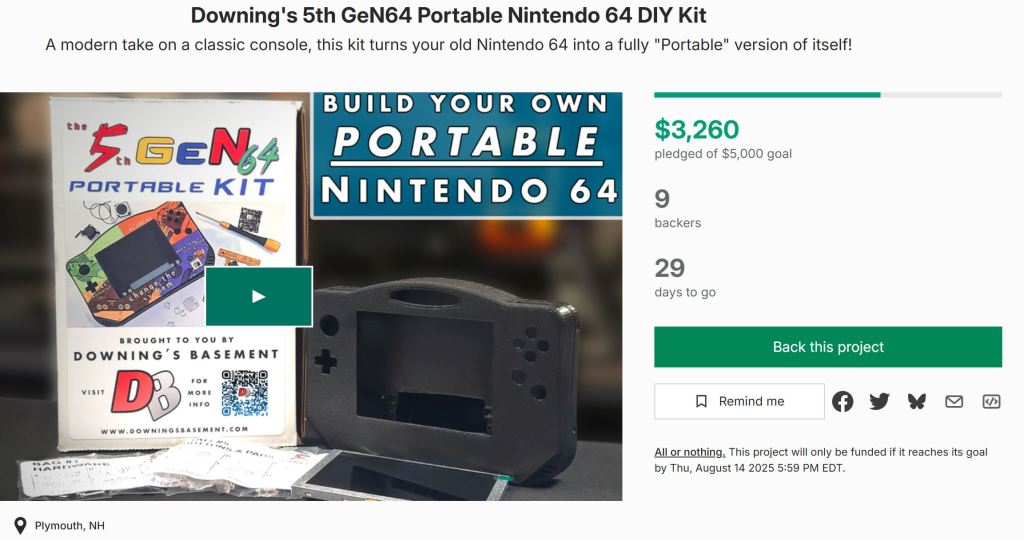
Well, 24 hours into a month long campaign and I am remaining cautiously optimistic! To be 65% on the way to the goal on the first day is not only exciting but also very humbling! For such a Niche market and not being an “inexpensive” product, to still have this kind of response before even a major tech blog has picked it up is pretty freaking cool!
But, I know full well how these things could work and it could sit just like this for the 28 days, no matter how optimistic I feel about it. hehe.
That said though, I just want to thank everyone who’s been a part of this, helping me out and keeping my spirts up when it all looked like it was about to crash out. I also want to thank Bob from Retro RGB for his article and small feature in his most recent POD cast that I’ll link below! Looking forward to meeting up with him again at Retro World Expo in September!
But yeah, I’ve very excited to see where this goes and can’t wait to share more updates! Talk Soon!
And at the time of this post, not much more than 3 hours after launch, we’re already a quarter of the way to the goal! Not bad! It will of course be interesting to see how it plays out, but I can’t wait to see where it goes. And even if it doesn’t hit after the next month, I’ll feel pretty good about how this all came together.
I’ll continue to post updates, especially if and/or when the funding goal is hit, because that’s just going to be a moment for me like you read about!
Thank you all again for joining me on this little adventure of mine! Your support means the world! Updates soon!
I can’t even begin to tell you the rollercoaster of a ride this has been for the past year! With so much planning and trying to make a meticulously calculated effort to bring the best portable making experience to the world, only to have the world turn upside down in a matter of days, kinda takes the wind out of your sails.
But, I’ve put too much time…to much effort…too much of what has become the Downing’s Basement Legacy to let this ride out any longer. Like getting married or having your first kid…you’re never going to be fully “ready”, but you can be prepared, and I think that’s where I stand with this project.
Actually, this would more or less be like having my 23rd kid if you put it in that kind of perspective, so I guess I’m “a little” more than prepared in that regard, but as for everything else, it’d be a lie to say I wasn’t a bit nervous!
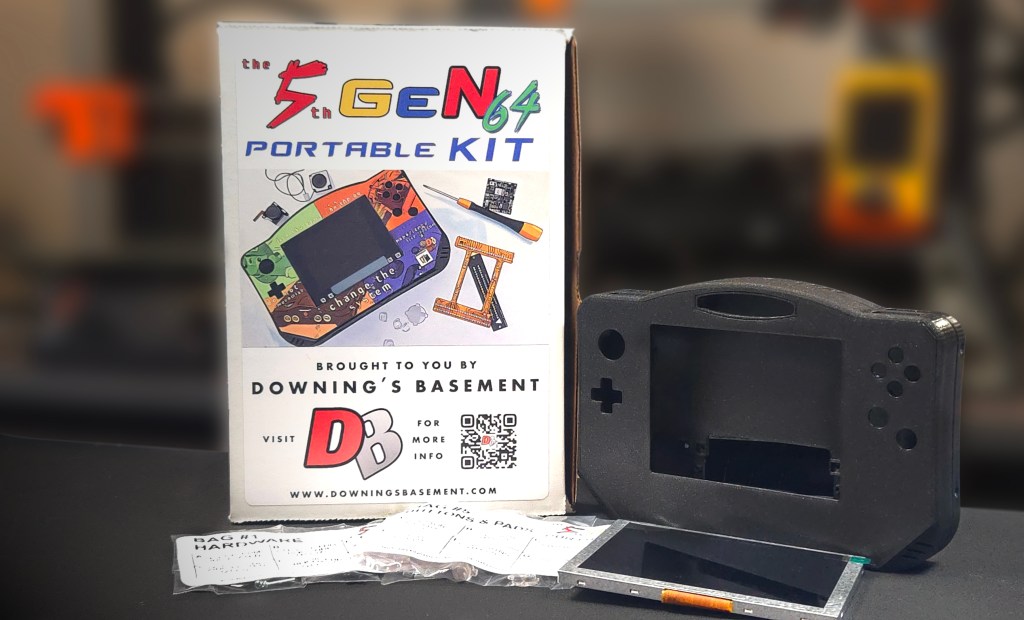
So now is the time and what seems like countless hours behind this keyboard alone, I can give a quick preview of what to expect on July 15th! The image above will bring you to the Kickstarter Pre-Launch page, where you’ll get a bit of info about what’s to come! Not gonna say much more right now, but I still can’t believe this is finally happening!
Hey guys! So today I had to make the decision to postpone the Kickstarter for The 5th GeN64 Portable Kit Kickstarter. A lot of unknowns going on right now with the global supply chain in which a lot of the parts that went into this kit were based off of. Video explains the details, but I am actively working on finding alternative solutions for this, but sometimes the best thing to do is ride out the wave and pick back up when things cool down.
I’ll be moving the Kickstarter date out to June 1st instead of May 1st in the hopes things change but it’s just very hard to say. Hopefully some vital components like the LCD screens are exempt as I’ve read in a few places which will be huge, but other things like custom PCBs and outsourcing the 3D printed cases could be a big challenge.
More info as it develops, but I just wanted to give everyone an update! Thanks for your patience!
As always seems to happen, The Midwest Gaming Classic has come and gone in record time, but what a time it was! Every year this show get’s bigger and bigger as does the number of modders and projects in the Bit Built Console Makerspace Room, which I believe we just about maxed out this year and was incredible!
That said, this year was particularly special for me though as after nearly a year in the works, I’ve finally been able to reveal one of my most ambitious projects yet!
Over two years ago, this started as a brand new portable Nintendo 64 design for my first new commission which had been almost 4 years prior to that! And when I say new, I mean a complete redo from the ground up with all new modern components, circuitry and case design.
Working with GMAN from 4 Layer Tech on creating a new integrated motherboard for the system that used existing 4 Layer Tech modules like the PMS Lite and UAMP for power management and audio, I started to get the warm and fuzzies about the idea that has eluded me for so many years…and that of course, was realizing every consoles modders dream that a “hand-holding” Kit for making a Portable Nintendo 64 was here!
More information about the kit itself as well as status updates are all going to be on the dedicated page in the header or you can just click the image above.
But the main goal is to have a Kickstarter live for the first week of May, 2025 and see where it goes from there!
So that’s the big news! There was much more to MGC this year though that I hope to be compiling in a new video as well as uploading the FULL Bonus Stage video of the kit reveal. So keep an eye out for that!
Other announcements, I will again be attending the Retro World Expo in Hartford, CT on September 12th through the 14th, but this time as a guest of the show! Not only will I have a showcase booth for Downing’s Basement, but I will also be joined by the one and only GMAN from 4 Layer Tech and Crazy Gadget of Bit Built!
This will be my first time showcasing at this event as well as BitBuilt’s but after roaming the floor for a couple of days last year, I think we’re going to fit in nicely!
I’ll have more info about this as it get’s a bit closer, but this is a good event for all my East Coast New England friends!
So it’s been a hot minute since I’ve made any kind of post at all, but this one has been a long time coming.
So for many years now, there has always been the questions from prospective modders and people interested in making in general that have asked what kind of equipment and products I use to make my portable systems.
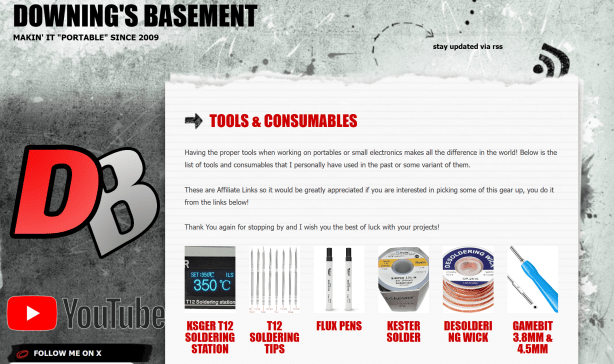
And while I can’t possibly list off everything I’ve used or what’s in my shop all together, there is a fine list of essentials, that based on what it will take to put together a portable console, I’ve now complied for you Amazon shoppers!
Now, this is my first attempt at using Affiliate links and I’ve been on the fence about this for a number of years. I just really didn’t see a whole lot of benefit to the idea, but things have been changing, and in the next few weeks, I feel that is going to turn a corner!
This isn’t going to include big ticket items like 3D Printers or CNC machines which, while still “essential” to my shop, doesn’t mean you won’t be able to get started without them. So if you’re just getting started and wondering how to equip your shop, this is a pretty simple base point.
Anyway, if you have any suggestions, questions or comments, feel free to reach out and I’ll try and help you out as best I can. I’ve got some exciting stuff coming out next month which I can’t wait to share…but I will!
Click the image above or find the page at References>Tools & Consumables