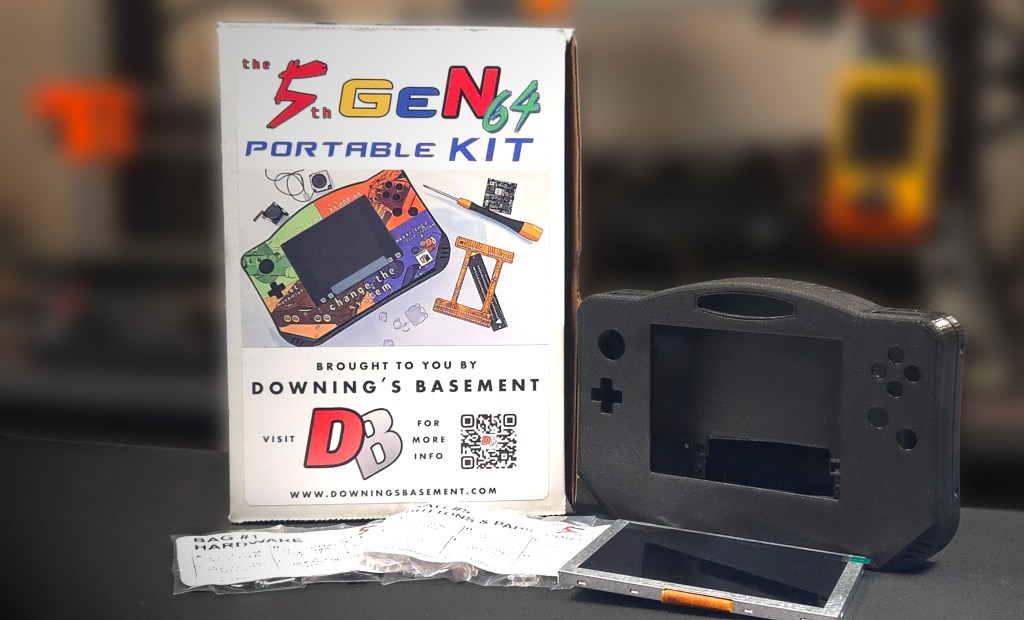
As always seems to happen, The Midwest Gaming Classic has come and gone in record time, but what a time it was! Every year this show get’s bigger and bigger as does the number of modders and projects in the Bit Built Console Makerspace Room, which I believe we just about maxed out this year and was incredible!
That said, this year was particularly special for me though as after nearly a year in the works, I’ve finally been able to reveal one of my most ambitious projects yet!
Over two years ago, this started as a brand new portable Nintendo 64 design for my first new commission which had been almost 4 years prior to that! And when I say new, I mean a complete redo from the ground up with all new modern components, circuitry and case design.
Working with GMAN from 4 Layer Tech on creating a new integrated motherboard for the system that used existing 4 Layer Tech modules like the PMS Lite and UAMP for power management and audio, I started to get the warm and fuzzies about the idea that has eluded me for so many years…and that of course, was realizing every consoles modders dream that a “hand-holding” Kit for making a Portable Nintendo 64 was here!
More information about the kit itself as well as status updates are all going to be on the dedicated page in the header or you can just click the image above.
But the main goal is to have a Kickstarter live for the first week of May, 2025 and see where it goes from there!
So that’s the big news! There was much more to MGC this year though that I hope to be compiling in a new video as well as uploading the FULL Bonus Stage video of the kit reveal. So keep an eye out for that!
Other announcements, I will again be attending the Retro World Expo in Hartford, CT on September 12th through the 14th, but this time as a guest of the show! Not only will I have a showcase booth for Downing’s Basement, but I will also be joined by the one and only GMAN from 4 Layer Tech and Crazy Gadget of Bit Built!
This will be my first time showcasing at this event as well as BitBuilt’s but after roaming the floor for a couple of days last year, I think we’re going to fit in nicely!
I’ll have more info about this as it get’s a bit closer, but this is a good event for all my East Coast New England friends!
So it’s been a hot minute since I’ve made any kind of post at all, but this one has been a long time coming.
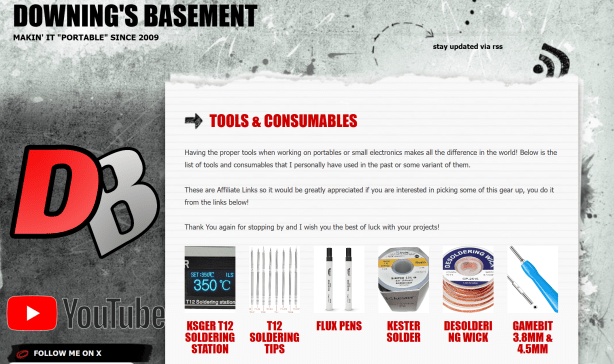
So for many years now, there has always been the questions from prospective modders and people interested in making in general that have asked what kind of equipment and products I use to make my portable systems.
And while I can’t possibly list off everything I’ve used or what’s in my shop all together, there is a fine list of essentials, that based on what it will take to put together a portable console, I’ve now complied for you Amazon shoppers!
Now, this is my first attempt at using Affiliate links and I’ve been on the fence about this for a number of years. I just really didn’t see a whole lot of benefit to the idea, but things have been changing, and in the next few weeks, I feel that is going to turn a corner!
This isn’t going to include big ticket items like 3D Printers or CNC machines which, while still “essential” to my shop, doesn’t mean you won’t be able to get started without them. So if you’re just getting started and wondering how to equip your shop, this is a pretty simple base point.
Anyway, if you have any suggestions, questions or comments, feel free to reach out and I’ll try and help you out as best I can. I’ve got some exciting stuff coming out next month which I can’t wait to share…but I will!
Click the image above or find the page at References>Tools & Consumables
So a couple weeks ago, I had the pleasure to attend a gaming convention known as Retro World Expo, at the Connecticut Convention Center in Hartford CT. It was my first time attending this one even though it’s been on my radar for several years now just because of how close it is, but timing never really seemed to work out.
But this year, not only was the timeframe possible, but I actually got to bring “Mini Downing” to the show as well, marking another first as it was his first time being able to accompany me to any convention. And man, was he excited!
Not knowing exactly what to expect being the first time there, I really only had the Midwest Gaming Classic in memory for reference, which may have been a bit of an “unfair” basis, but it was still comparable. But the big difference was that at this convention, I wasn’t actually “working” it like I do with the Bit Built crew at MGC. So this allowed both of us to really explore the vendor floor as well as partake in some of the activities like tournaments and watch some live wrestling!
But one of the big draws for me was the guest list which was absolutely stacked! I got to meet people like Clint from Lazy Game Reviews, who is a You Tuber that I’ve been watching for years, as well as Tito from Macho Nacho Media and Rob from Retro RGB. All of these guys I’ve had a connection to in some form or another, but meeting face to face is always a very surreal moment.
The video above gives all the details of the trip and more about the people we were fortunate enough to meet! Definitely looking forward to this convention next year!
Thinking back, this has been one strange and amazing ride since “The 5th GeN64” made its debut back in February. But I knew that after taking over a year to conceptualize, prototype and build the first version of this portable, that I had a pretty special design on my hands.
Fast forward a couple of months from its initial release and the Midwest Gaming Classic was right around the corner, which I made a challenge for myself to bring not one, but two completed N64p’s to the convention. And though it was just by the skin of my teeth, it happened and I had two fully functional “Zelda” themed portables on display.
But little did I know at the time that things would be taking a huge “holy shit” kinda turn shortly there after and a You Tuber by the name of John Riggs and an Instagram video would begin to change my perceptions of my little corner of this hobby, as it currently sits around over 1.3 million views! Which to me, is a pretty damn big deal!
This in turn lead to the next challenge, which was to see if this effort was repeatable plus some and as design and assembly improvements made there way into these builds, not only was it doable, but it was faster and more reliable (albeit a few hiccups) than building 2 were just a few months prior.
Of course there as been a lot more going on since this and for the first time, at the end of August, I’ll be attending the Retro Game Expo in Hartford, CT. I’ll only be going as a spectator and I’m looking forward to having my son tagging along for the first time as well! So this has been a year of firsts that just keeps getting better!
Hard to believe that it’s been over 8 years since my last major design of a portable N64. I mean to put that in perspective, the portable version before that was a vacuum-formed and frankencased monstrosity that might as well have been held together with bubblegum!
But after the Cross Plane project finished up at the end of 2013, I found myself for the first time with access to new maker tools that were just starting to come within public reach. And those tools were of course, 3D printers and low volume prototype boards for custom electronics.
Although this crossed over with my CNC efforts which had begun to take hobby vacuum-forming to the next level, the ability to design from the inside out was just too enticing and thus CAD and 3D printing took over and it was only a matter of time before I circled back to the N64 with these new methods.
Fast forward now to the better end of a decade, and not only am I back with a brand new Nintendo 64 portable, but one that uses more fabrication techniques than I could have ever believed I’d have access too.
I first have to acknowledge though that this build was not a sole effort on my part, nor have most of my projects over the past decade. And in this case, I collaborated with some of the best in the business when it comes to portable making, and in fact some of those whole actually made portable making a business.
A huge heartfelt thank you is owed to Gunnar (Gman) and Aurilio of Bit Built and 4 Layer Tech for all their help with the shit I don’t understand! That of course mainly being circuit board design and firmware, to which the entire new system was based around.
TECH SPECS
While the video above does go though the system and some of its key new features, it doesn’t go too into detail with how it’s made or specifically what’s under the hood. So for those who like that kinda thing, here we go.
Enclosure – As per the standard, the base is made up of (7) 3D printed parts. A front and back face plate, a front and back face bracket, a cart cover and 2 battery covers. Also 7 bracket clamps hold the two ends together with flathead machine screws.
Buttons – The actual buttons on this one are all SLA 3D printed in clear. And though the R/L & Z buttons use the traditional soft top tack switches, the rest took advantage of having a real PCB motherboard and used the conductive rubber membranes like the pro’s use! We’ll get to that in a bit, but for the R/L & Z, I had to rethink how the best way to mount them to the case would be. Not tryin to brag, but this side-channel bracket system not only fit well with the design, but the feel and responsiveness is on par with a real controller. So simple, yet so effective!
Display – The display is the one thing that I have not changed. It uses the same 5″, 4:3 Aspect Ratio display as many others. This first set-up only uses the standard composite display, which isn’t the best but does the job.
Screen Protector – This is the first time I’ve used this technique on an N64 portable, and just like the experience I had with the Tiger Boy Advance, I found that custom artwork printed on Self-Adhesive Vinyl gave the sharpest result. This allowed for the used of a plain, non-printed, piece of CNC cut acrylic to be used as the lens itself, which simplified a lot of the cut and print process. Figuring out how to make the backlit logo shine through only when there was backlight was a bit of a challenge.
The Backlit Logo – Blocking out only certain parts of light is a challenge. My first attempt used a blank piece of CNC cut acrylic with the Nintendo logo cut out of a black self adhesive vinyl and applied to it. While this did the trick, it wasn’t as clean as I hoped and the new versions take advantage of Layered Printing, with the blackout layers built right in.
The PCBs – This of course was the big one and their design and testing took a majority of the overall time it took to get this project completed. Aside from the main motherboard, there were 3 Sub-boards specific to this design. A power/volume board at the base, an LED board for the logo back light and a backer board for the new Cart Slot FFC.
The board also was designed around (3) 4 Layer Tech boards. The “U-Amp 2”, A “PMS-Lite Rev E” and a soon-to-be released N64 controller board that uses an original N64 controller chip, but has a multiple set-up options for custom configurations as well as built in FRAM for game saves.
This particular controller config is set up for a Nintendo Joy Con control stick, with programmed dead zone and drift reduction, along with a hotkey that allows recalibration if need be.
The U-Amp is also very cool because it supports a switchable headphone jack. We all miss the headphone jack, they is no deigning! The speakers themselves are also new to me, but they are the same ones used in the original GBoy kits. Not at powerful but they work.
These three boards solder directly to the main motherboard, which makes the once tedious wiring an absolute breeze!
USB C Charging – One of the main benefits of the PMS-Lite is its ability to support USB-C charging with Power Delivery. This allows for the use of a very standard charging solution that is available almost everywhere and can really speed up the process.
New Cart Slot FFC – This is a redo of the original FFC cart slot relocation that was originally done by RDC. The problem with that version is that the trace length was really maxed on certain pins and just not a very consistent length. The video does a good job explaining what we had to do to make this work as intended!
Battery Power – The system is powered by (3) 3.7v Li/Io18650 battery cells. Originally the idea was to power it with just two, but since I’d never used them before, I had no idea how little battery life they had in comparison to the 7.4V Li/Po flat cells I used to use. I learned a few important lessons about Volts X Capacity to = Watt/hrs, so a third cell needed to be added and it was all a matter of luck that it actually fit!
The N64 – As before, the main system is a moderately trimmed N64 main board. No crazy RCP rewiring or expansion pak relocations. Using CNC to manually trim is one of the best things ever!
I’ll more than likely be adding to this post with things I forgot or be making additional posts about this in the future, but hopefully this gives a pretty good overview of what this project took to complete! I appreciate you as always and if you have any questions or feed back, send ’em my way!
Hey everyone! So I just wanted to give a bit of supplemental content to my last project. Though I put a great deal of time into the first video, this is just quick and dirty overview of some the play modes and features that I didn’t include in the first one.