
So I decided to treat myself to a late Christmas present this month and picked up a monitor that I had been doing lots of research on for the past few months. And for the price point, the Acer Predator XB273K was toping charts all over the place. The one big complaint though, the base, and it didn’t take very long to figure out why. So knowing this ahead of time, I started to brainstorm on ways I could fix this somewhat invasive base.


So after a few hours I had a design I was ready to test out, but of course, when I took the base off, the arm of the monitor itself had a metal sub-base that had 3 extrusions for whatever reason. So, back to Solidworks to figure out how to recess out the piece to make up for that.


But once I figured that out, all was good!


So it wasn’t very long after I had it installed, I shared the project over on a couple groups on Facebook and got quite the response to it. Most were great and many wanted this for their monitors as well, but others had some feedback that addressed some legit concerns.
So I made a V2 that put 3 recessed hex bolts in the base, under those extrusions so that if one wishes to drill holes though their desk, the can bolt directly too it and not have to worry about the clamp at all.
And the best part, those STL files can be found here:
And though I shouldn’t have to say this, downloading and use of this mod is done at your own risk, but here are some guidelines!
You will need to pick up some M6 Hardware and depending on which method you use to mount will affect what hardware you need. Also, both methods use the included screw on the original monitor base to mount, so don’t lose that!
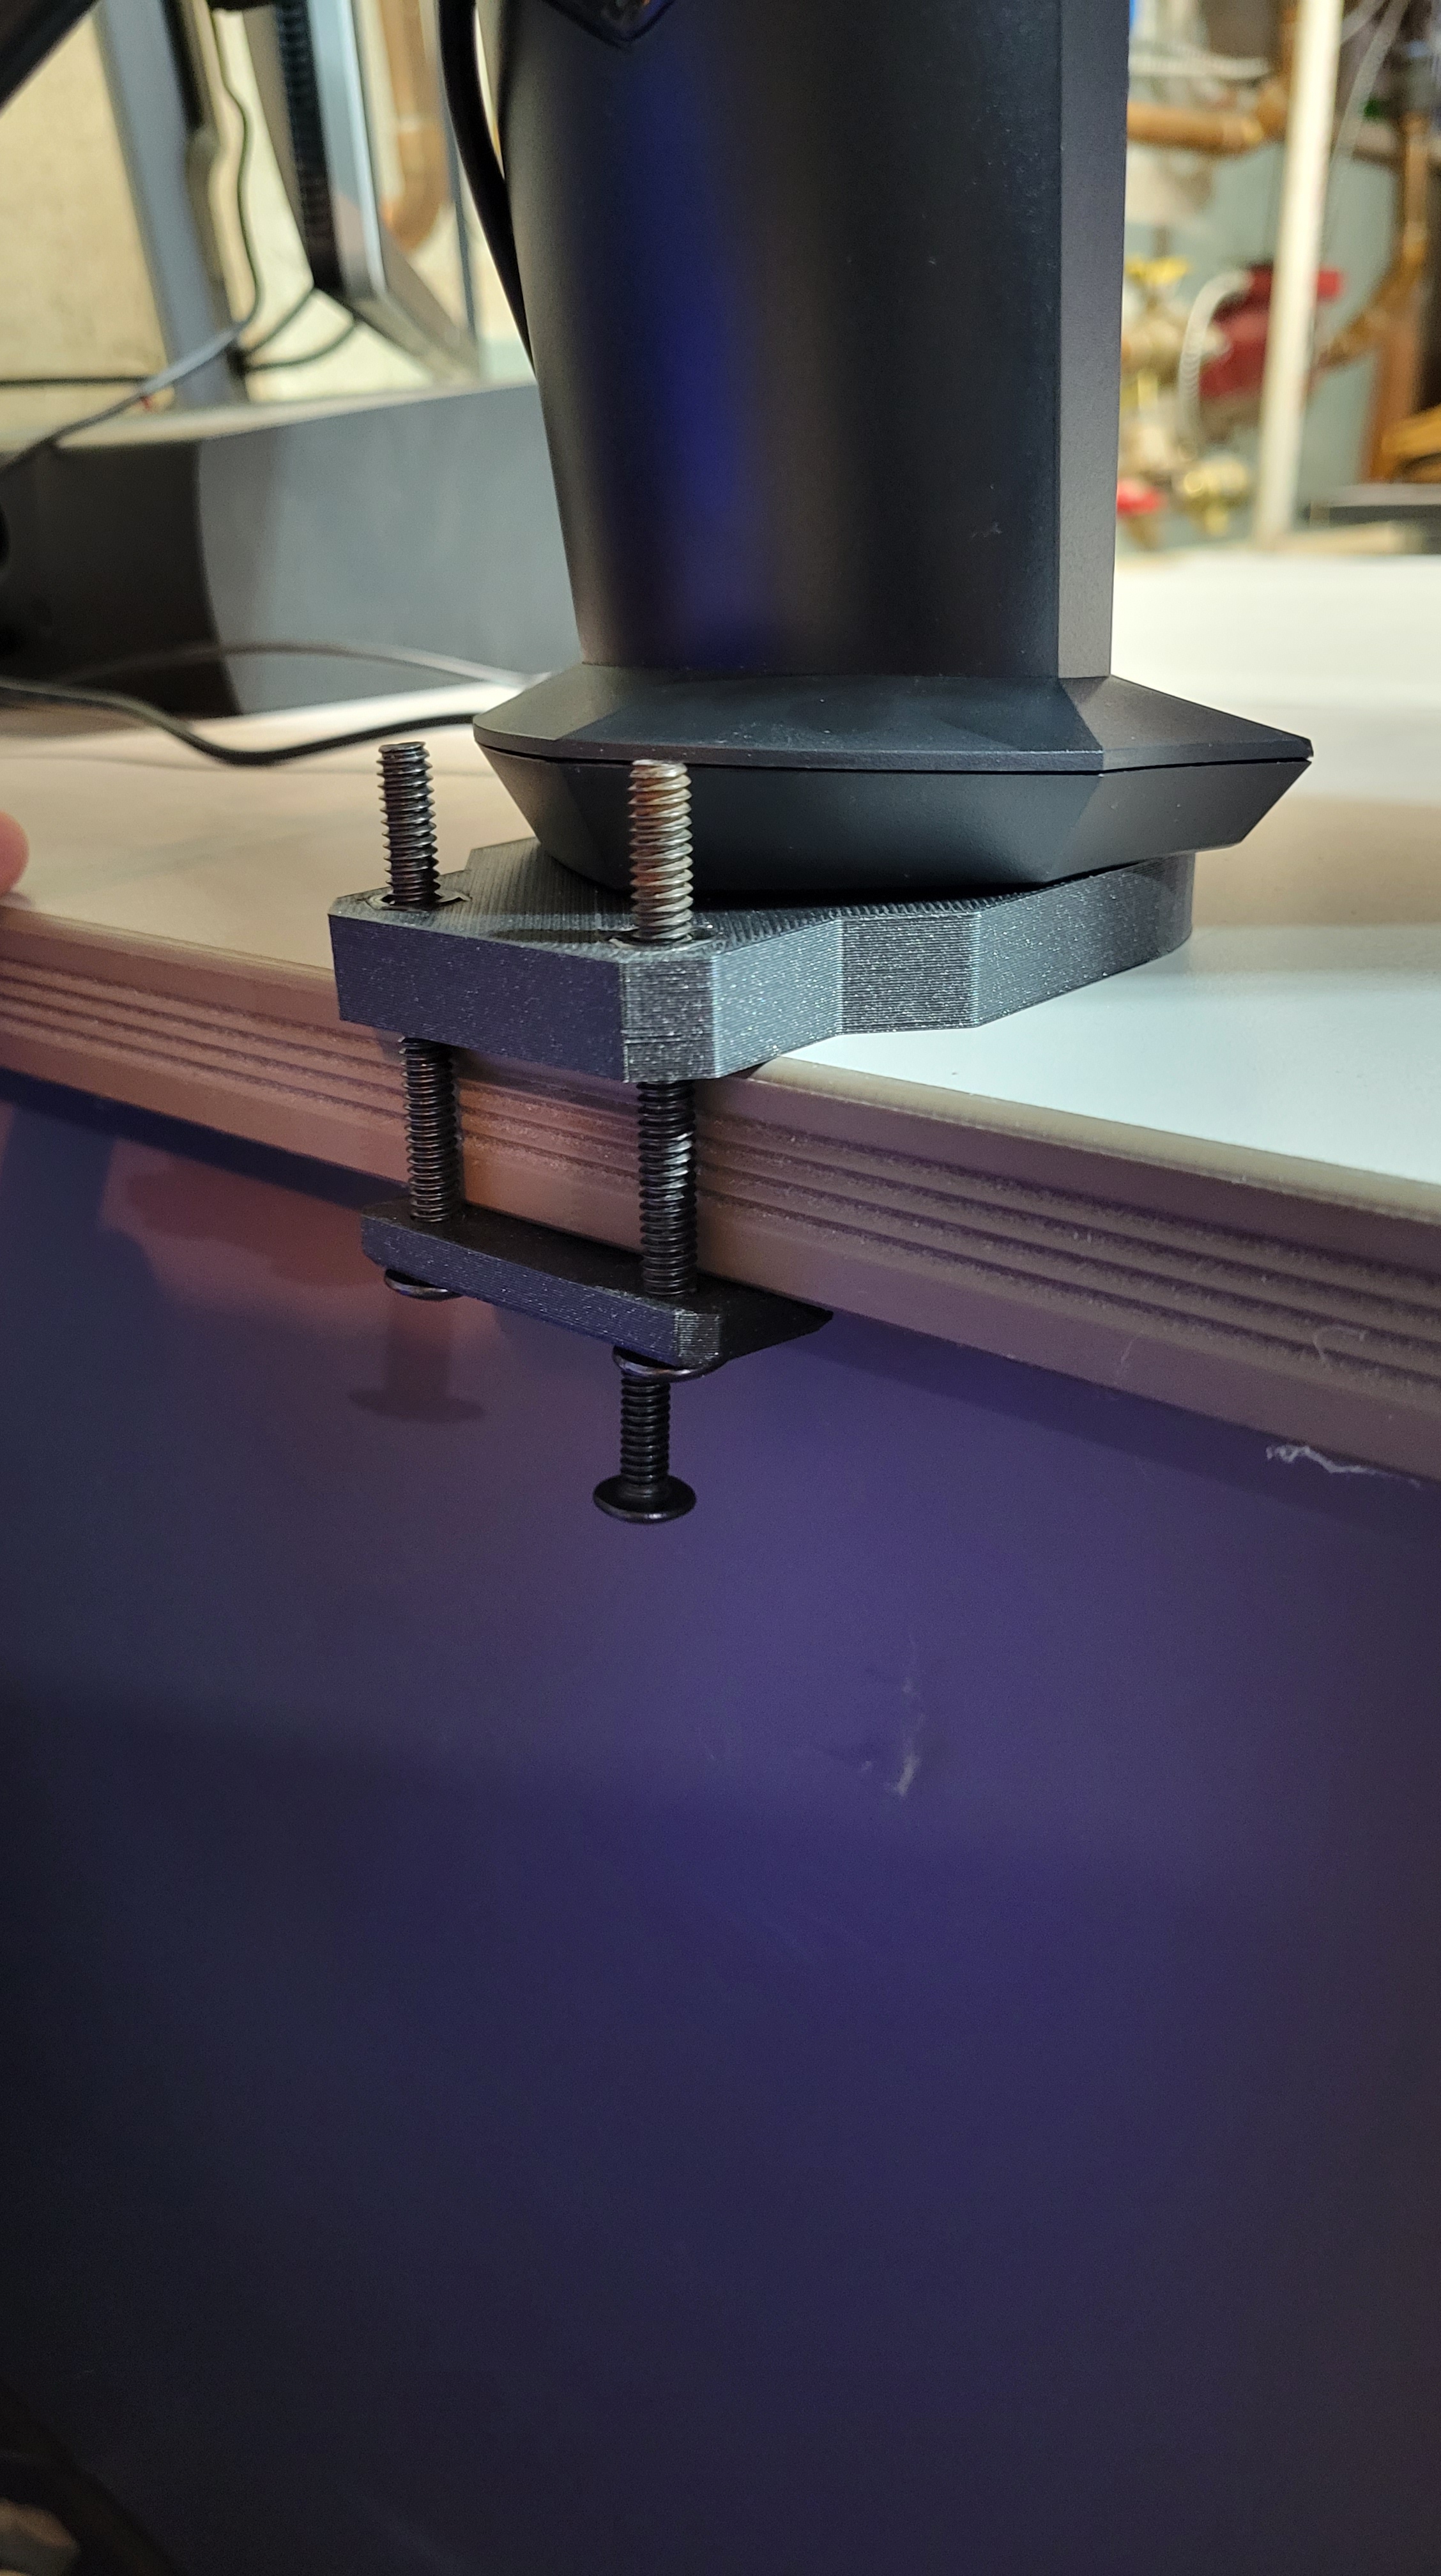
The Clamp Method (V1) – Depending on how thick your table top is, you will need:
2 – M6 1.0 x 35 to 50mm Pan Head Machine Screws (PHMS) for the main clamp screws
1 – M6 1.0 x 25mm PHMS for the Retention Screw
3 – M6 1.0 Hex Nuts
The Hex Nuts fit very tightly. I found that wide mouth pliers do a great job forcing them in evenly. Alternately you can thread a screw through the back and keep tightening the nut until it pulls into the recess. (That’s an old Prusa trick) Mount the base to the monitor arm and carefully screw the mount plate to the base and then the retention screw to the table. Also, you will need at least a 1.5″ lip on the back of your table for the clamp and retention screw to hold properly.
The Screw Down Method (V2) – Because there would be no way to get a screw driver to stop the screw from spinning when the nut is put on, this version is going to require alternate hardware.
3 – M6 1.0 x 35 to 50mm Hex Cap Screws (HCS)
3 – M6 1.0 Hex Nuts
3 – M6 1.0 Washers
To mount, first you will have to drill 3 holes in your desk. You can use the base as a template.
Then you will have to feed the HCS through the base before you mount the base to the monitor stand. Once that is mounted, feed the screws through the holes on the desk and tighten down from the bottom.
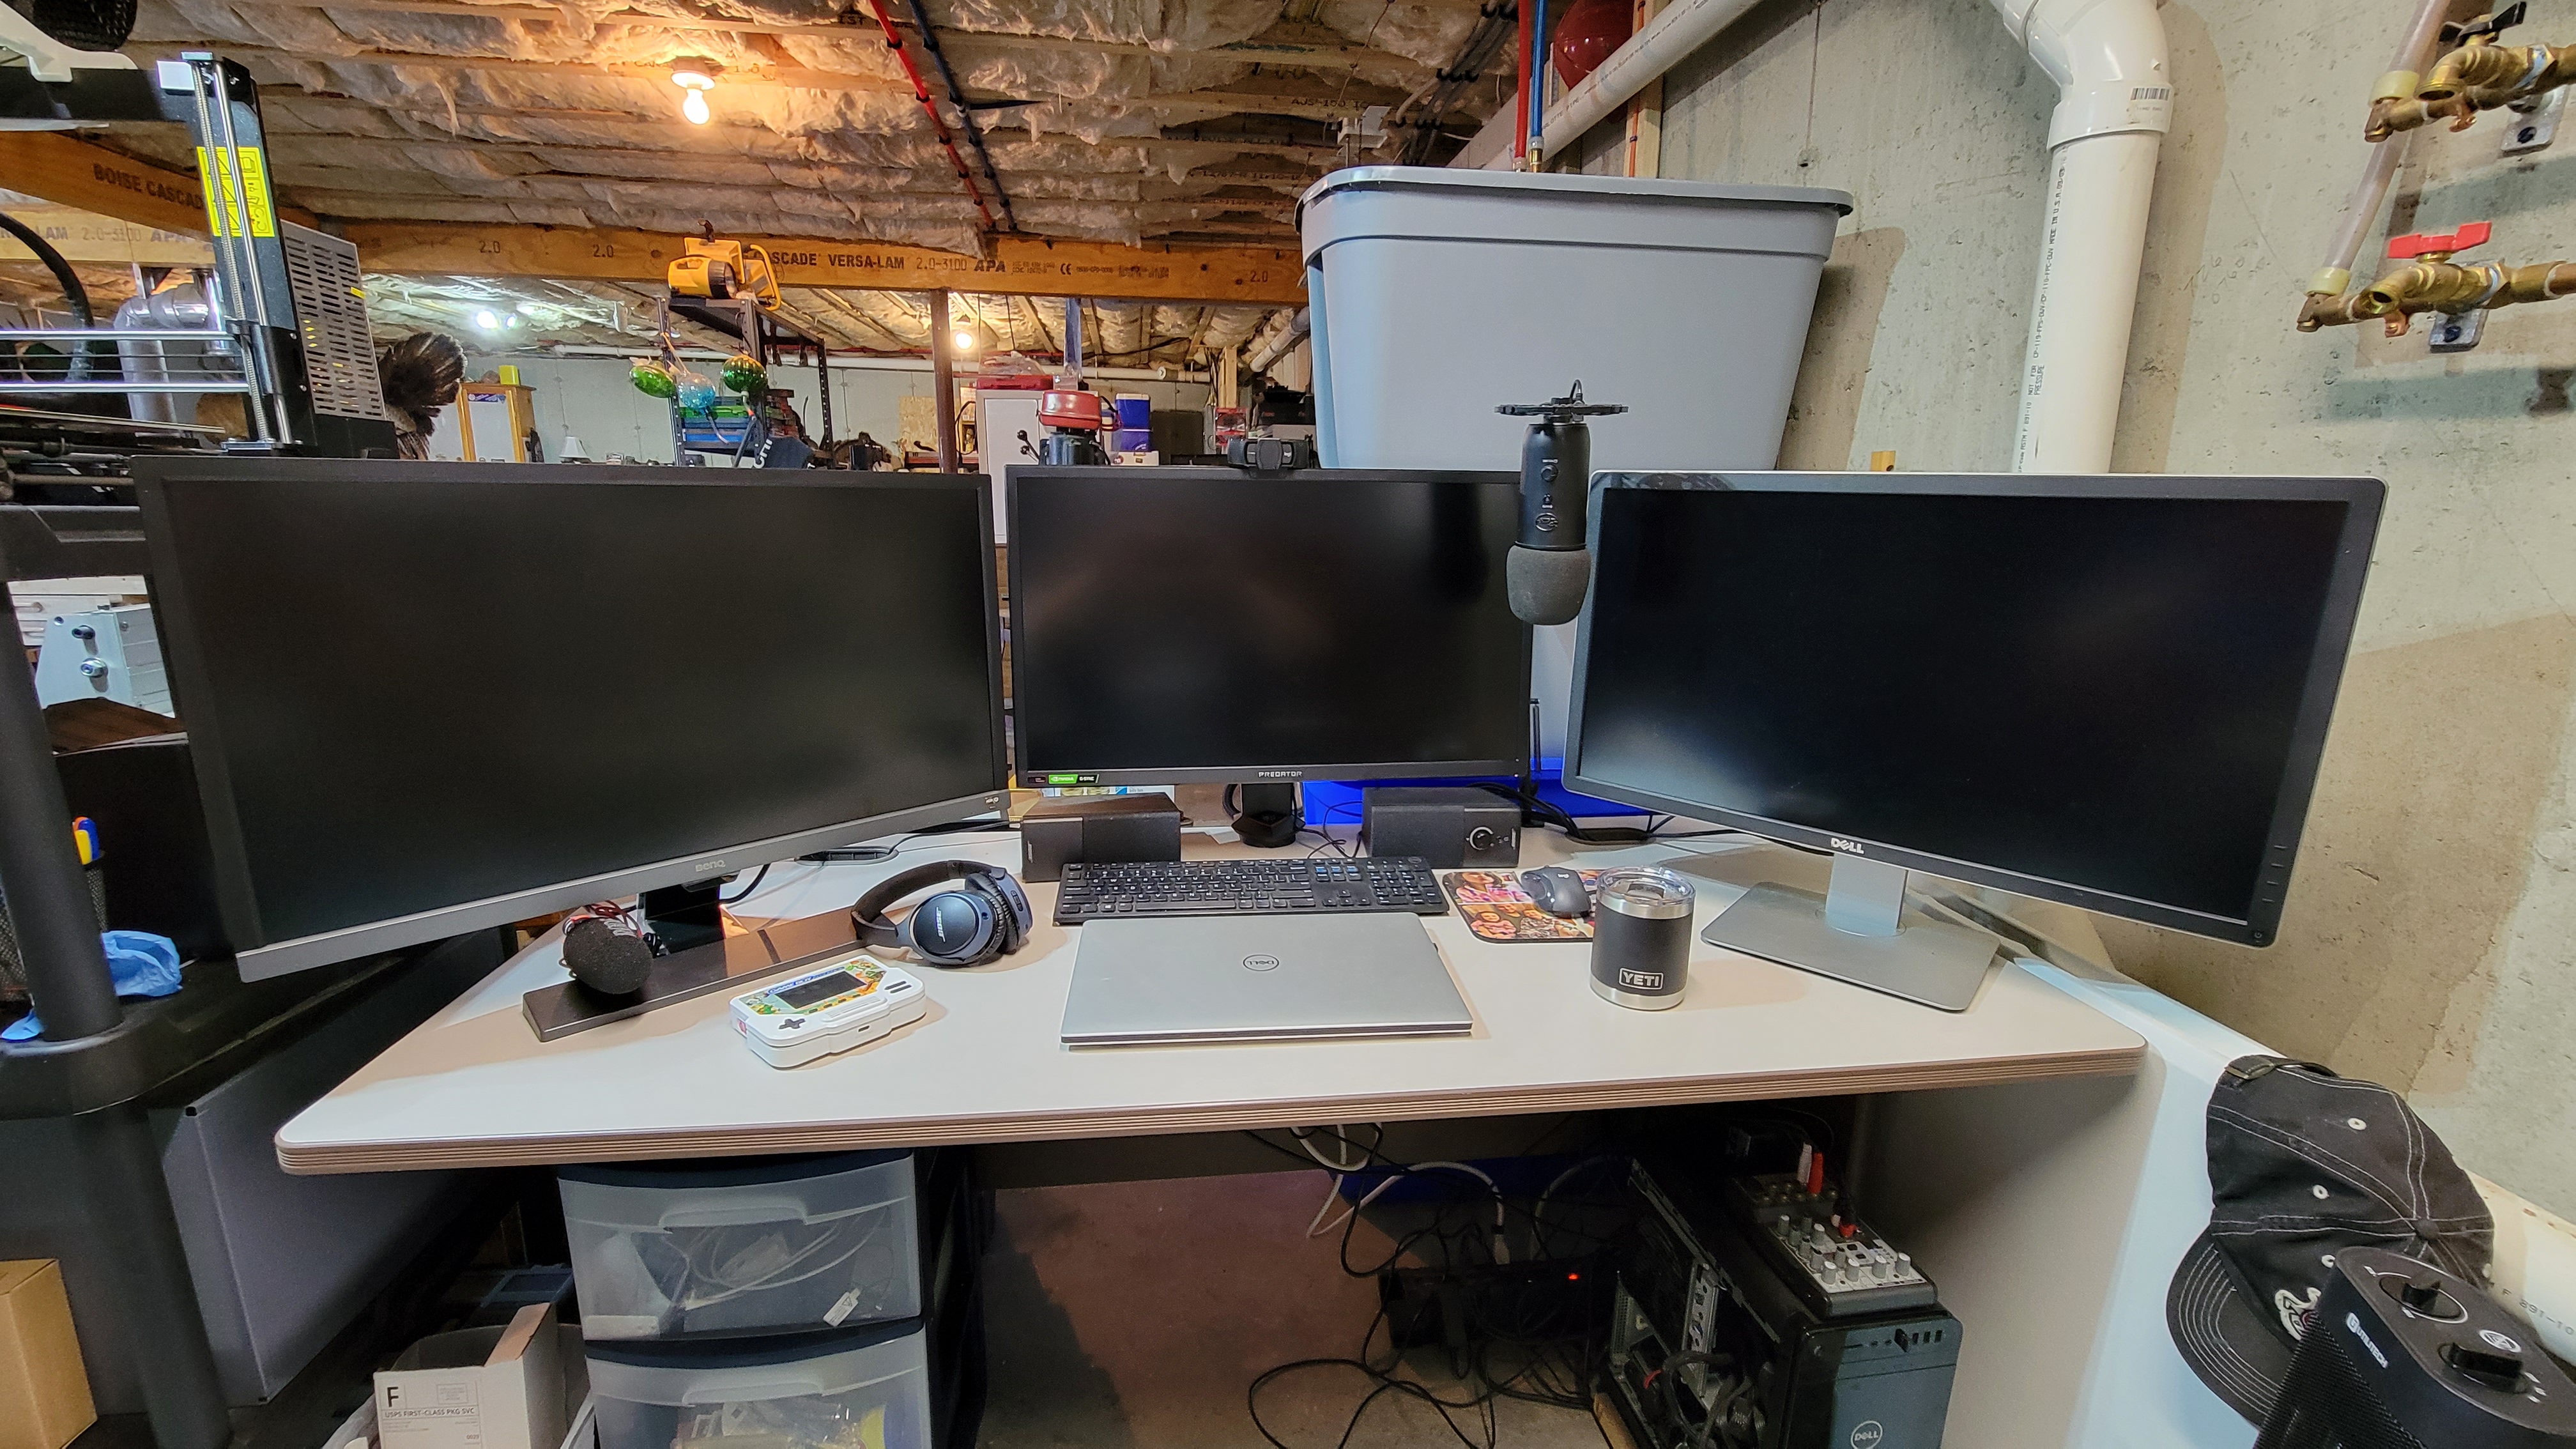
So as you can see, this mount is a HUGE space saver and I’ve now got my desk back!
As a note, I have not personally used V2 yet because I don’t have interest in drilling into my table. So if there is any feedback on this, please let me know so I can make adjustments.
But, hope you enjoy!
