Posts Tagged ‘3D Printing’

What a week this has been! In addition to finally shipping off the 2nd N64p that I’d been working on for months now (video soon), a French friend of mine posted his video on the PSOne Mini which I printed and shipped to him (the SLA version) about two months ago. This guy’s videos are an amazing representation of what truly goes into making mods like these and I’m very excited to have been a part of its creation. It’s a long video but very detailed in terms of explanation of methods and pro/cons of each. A great watch and I highly recommend you check it out! I also thank him for the shout out’s he provided towards the site!

And, Ol’ Ben Heck finished off an N64p himself which he’s been working on for many months now as well.

For some reason or another this has sent a great deal of traffic my way which has added to the excitement of the past few days.

Also, I’ve just started assembly on my new Prusa i3 MK2S  Printer which I got earlier in the week. I’ll have a video of that process posted once complete, but this is what I’m hoping for for an end result. Time will tell if I can assemble the way it needs to be done to achieve the same results, but I’m hoping for a very nice basement upgrade for my FDM 3D printing projects! More to come soon!

Sorry it’s been a couple months in between posts. It’s been exceptionally busy these past couple of months but as far as modding and projects are concerned, there’s been a lot of waiting.

First off, the most exciting news is I’ve taken on another commission that started a couple weeks ago. This will be an NTSC Super Nintendo Portable, going over to a buyer in the UK. Yes, UK and NTSC…dunno why, but that’s what he wanted. Now some of you know that after the last shipping fiasco for the N64p that I shipped to the UK back in July, I had sworn I’d never do that again (cost almost $700 to get it there), but the buyer and I have made an agreement and hopefully nothing goes wrong in transit. But anyway, this will be a new project for me as I’ve never done and SNES portable before, though it already looks to be simpler than the N64s. But, I’m also going to try something else new that I’ve never done and that’s to make a portable that will output RGB to the display. For those who don’t know, RGB is an output method that has three different channels that the system outputs to the display, Red, Green & Blue which are then mixed together at the pixel level to make the desired color. This is a far superior method to the standard Composite output which just takes an output signal and mashes it all together through one line, which creates blurry edges and sort of washed out colors.

The way I plan to do this is using a SCRART to HDMI upscaler and use a 5.6″ 640 x 480 display and see if I can get that to work. It’s a lot of extra hardware to cram into a portable, but if it works, the crisp display image will be well worth the extra costs and learning curve. If you want more info on how RGB works in retro consoles, check out the link below and give Bob a like as he’s put an extreme amount of time into his site and the info there is amazingly useful.

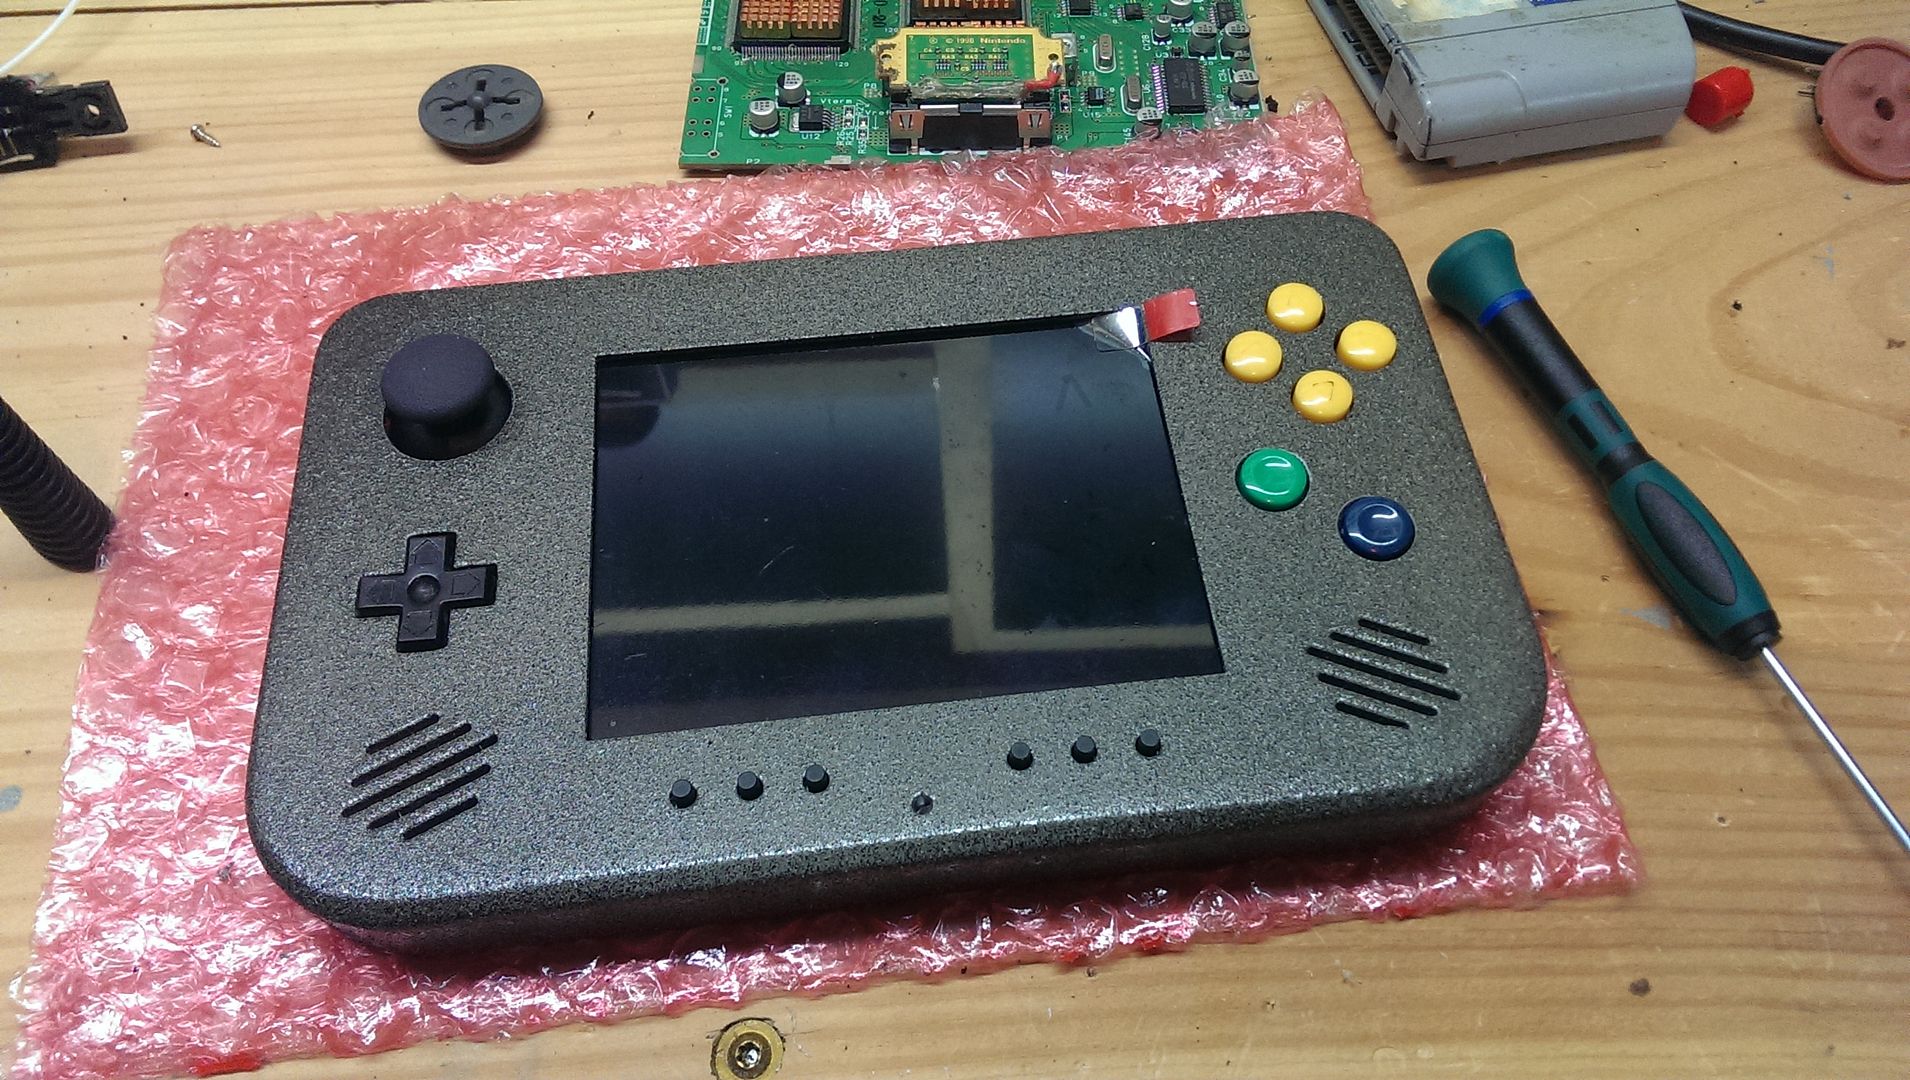
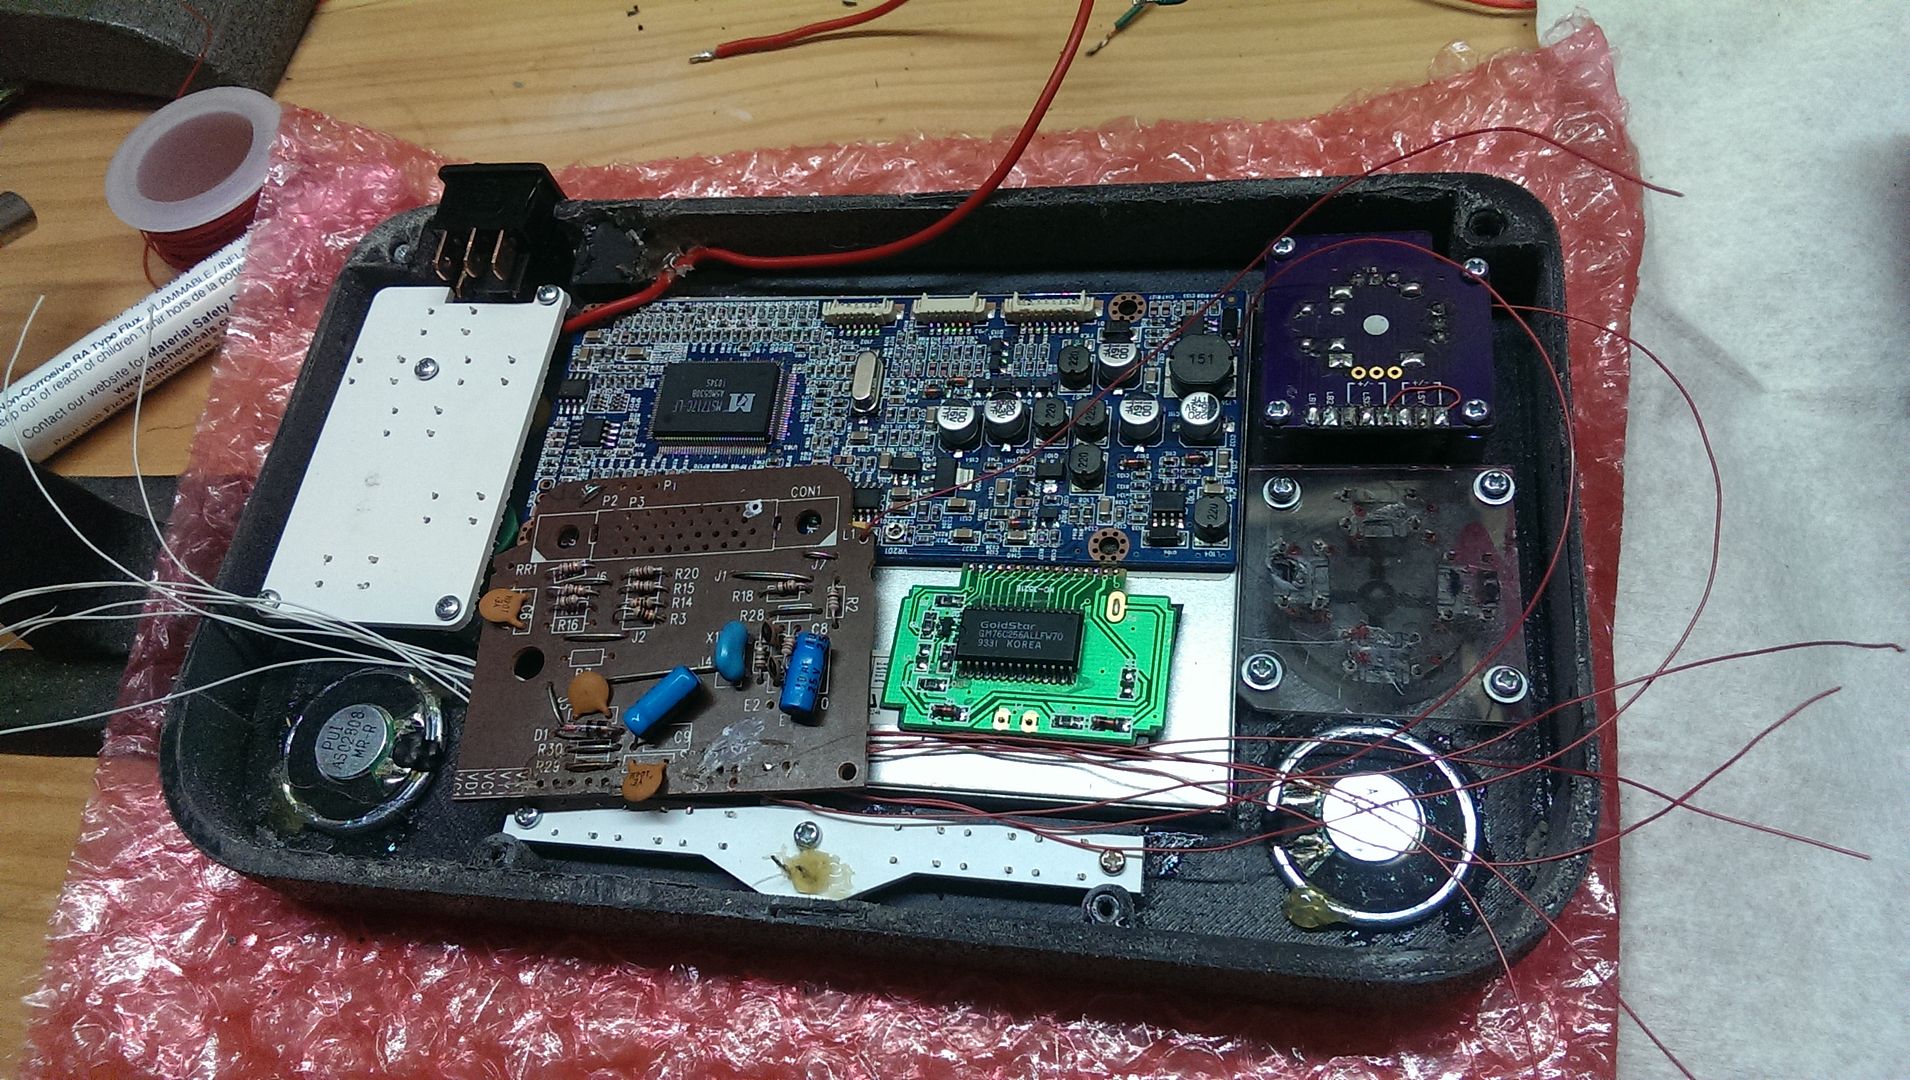
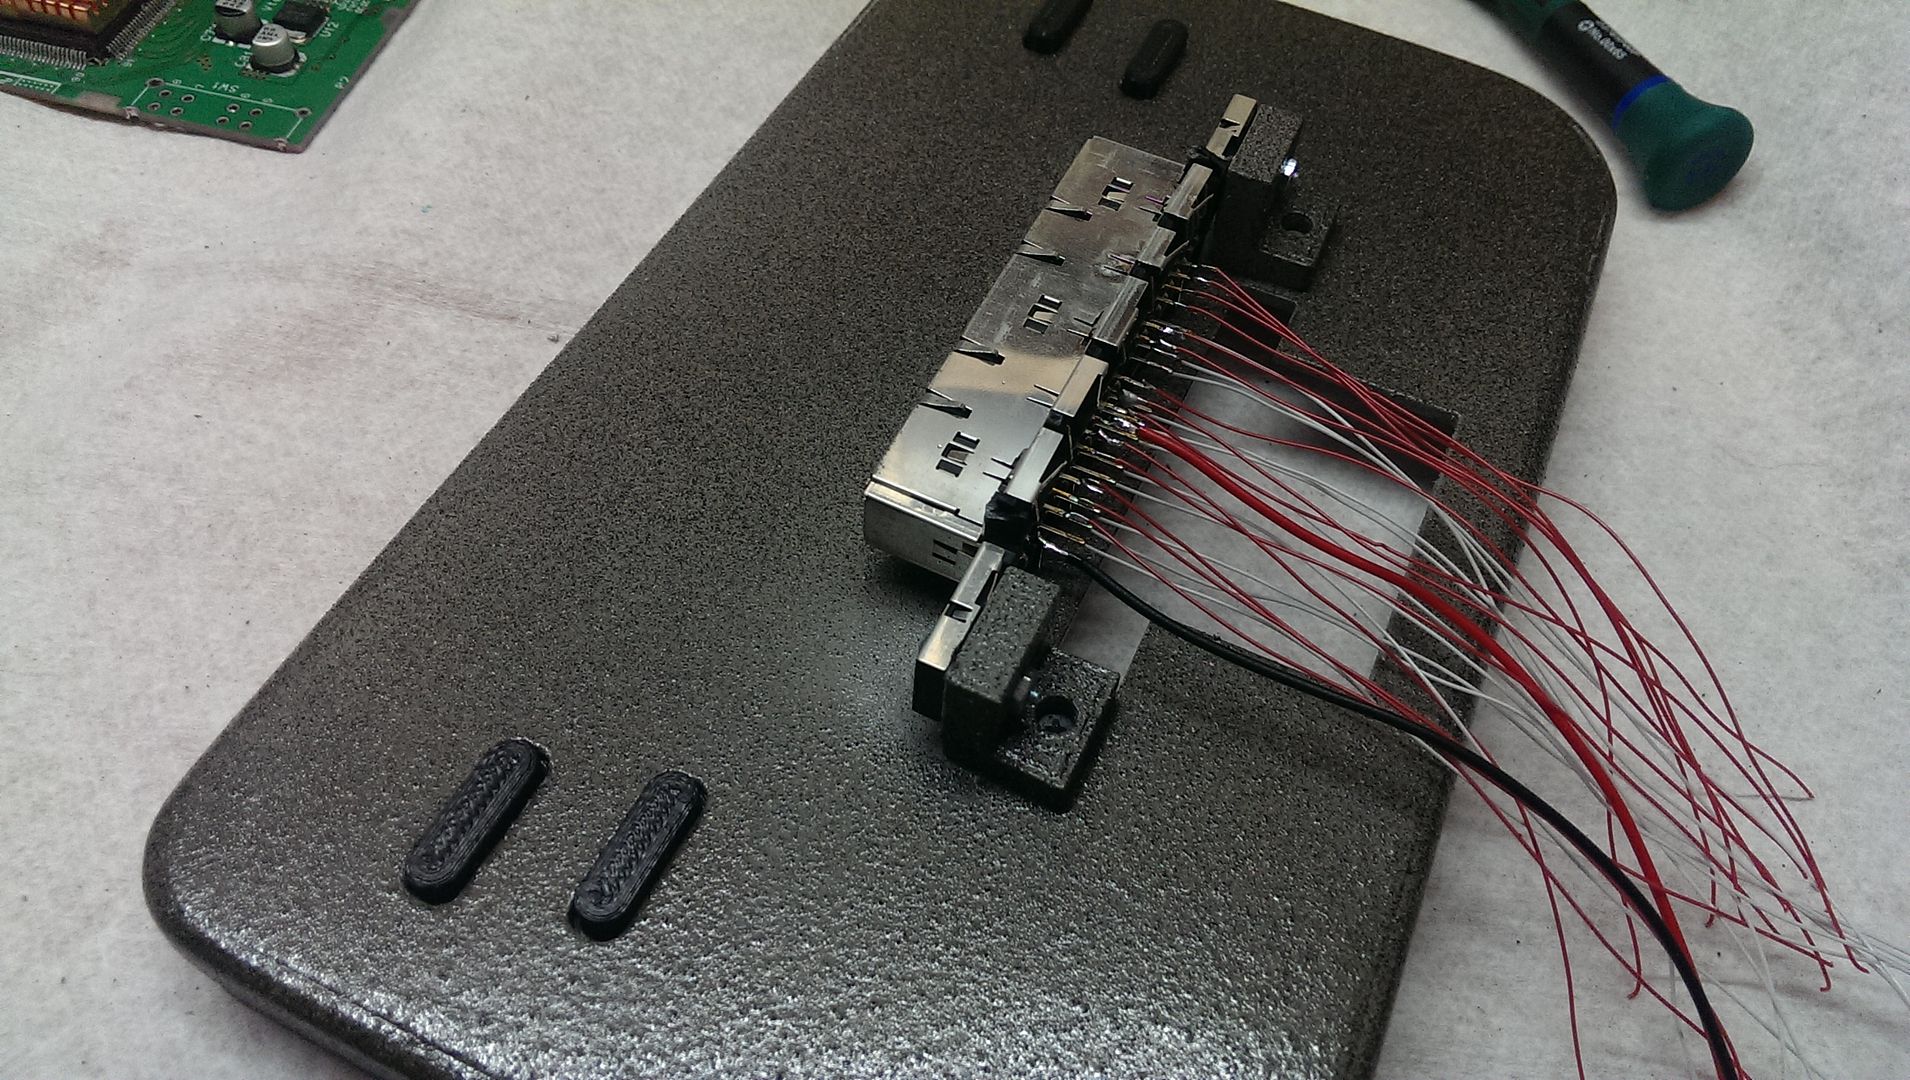
The other project I’m working on is another portable N64. This is just kind of a side project but there is going to be a bit of a twist to this one as it’s not going to be a standard N64p. I was going to try and RGB mod this one as well, but the case work was already done as far as the 3D printing was concerned and for what it’s going to be, I really didn’t need to front the additional costs to implement that. But until I get a little bit further into the project, I’m gonna keep this one sealed until I’m ready to show it off!

That being said, I’ve also been working on upgrading my two primary means of case making, i.e. my 3D Printer and my new CNC Machine.

First, my 3D printer has been great for the nearly the full year that I’ve had it. But over the past few weeks, I had been extremely frustrated with it as no matter what I did, the prints I would make would all break loose from the build plate. After more than a dozen failed attempts at printing the N64p case that I’ve been working on, I finally threw the white flag and went searching for answers on the Internet.

My first attempt to help fix the printer was to upgrade the firmware. I had never done it and I couldn’t get the system to print over USB and my readings told me that upgrading the firmware was the way to go. So I found the most updated version of the FlashPrint software and the latest firmware. I installed it and…. bricked the entire system. (Grumble) Turns out I have an older version of the Dreamer and the latest update as I found out the hard way, would kill the system. Only by downgrading to the 1.3V of FlashPrint and the firmware that came with it and through a very odd process to re-install it, was I able to get the system running again. I found the last known version of the firmware that wouldn’t turn my printer into a paperweight and it started working great and I could then use my PC to send directly over USB. But, this still did not fix the lifting issue and I was getting even more frustrated.

So I went looking some more and I had known for a long time that people printing with PLA were having great success using glass print beds. I too had known this first hand as my friend Jon (Hailrazer) Jandran did so on his Makerbot and the results were beautiful.

That’s when I came across Makersome.com, a 3D printing store/community based in California that offers great advice and solutions to 3D printer people everywhere, that had a glass bed kit for the Dreamer. For $40 I was willing to give it a try. It came in earlier this week and with a free Saturday, I decided to break it in. I just have to tell you that the results are nothing short of fantastic! As we speak, the printer is working on the last piece of the N64p casing. 4 print jobs, 4 completions with 0 lifting. I mean these corner have always lifted a bit on every project I’ve done, but using this glass print bed, they match up as if they had been sanded flat. Very very pleased with this investment. So if you are into 3D printing as well have a FlashForge Dreamer or Creator Pro, check out their kit upgrades at Makersome.com Makersome-Logo-FINAL-No-tag-300x59

Lastly, my CNC is under a new upgrade process as well. Even though it was brand new and I love the machine itself, the Chinese have a way keeping costs down which can lead to some questionable results with the final product. In this case, the lack of power with the controller hardware. This is a decent sized machine that pulls some pretty heavy components of it. Though the stepper motors are more than capable of doing the job, the controller that drives them are not. This has been one of the biggest complaints out on the CNC Forums when these machines are concerned. So after I posted a video of the unboxing and my issues, a You Tube user was kind enough to guide me in the direction of a decent upgrade for relatively low money. Long story short, I received in 3 new industrial stepper drivers which I’m in the process of swapping out. I’ve had to take it slow though as I’m not 100% sure what I’m doing with them and just have to make sure I don’t screw anything up. But hopefully once this is complete, I’ll have a machine that can be used to it’s full potential.

So yeah, that’s what I’ve got going on! Like I said, busy as hell, but a lot of down time waiting for parts and materials to come in the mail. Hopefully updates will be a bit more frequent now that I have some real projects going again and we’ll see how these new endeavors pan out!

Seems these days that the time I once had plenty of for my projects have long since become a memory. With life pushing it’s way in between me and projects, I’ve been forced to scale back and make due just a few hours a weekend.

So that being said, my main priority has been the N64 commission I’ve been working on. A great deal of progress has been made and hopefully within the next couple of weeks I can have this one buttoned up. There are a few pics below that are actually about a month outdated, but they are all I have at the moment so they’ll have to do.

The testing phase for the motherboard as far as its functionality after being trimmed, the expansion pack, power, the cart slot and the A/V have been successfully completed. Now I just need to do some tidying up and securing the system in place for the next phase, the controller.

So far I’m very happy with how this is coming out and the new 3D printing techniques and part finishing is proving to work out nicely. I’m really wishing I had a resin printer for these smaller parts but one step at a time.

So my next post probably won’t be until this is complete, but if all goes well, it should be done in a couple weeks!

The problem with the pursuit of perfection is that it over looks the steps it took to get there when based on a cumulative scale. By that I mean that a project that brings you back to your origins while showcasing the skills that have been put to use since then has a whole different sense of gratification. N64p’s are losing to both practicality and cost reasons on any selling level, but the sheer fact that they can be built just for the sake of it and still get better as time goes on is a very meaningful continuation of an old idea that was so popular just a few years ago.

Anyway, now that the philosophic portion is out of the way, I made a great deal of progress on a N64p Commission I’ve been working on for the past couple of months. With the design process complete, the time came to finally start with the assembly portion of the project. This is an old school mod all they way, but does have a few of the benefits like 3D printing and CNC machining in it’s corner to make this one of the finer designed N64 portables I’ve made.

In any case, just wanted to share a project update aside from the OUYAp V2. These simpler projects are much needed from time to time to remind me that the “hobby” aspect is what I fell in love with long ago and what keeps me going with it, even if it seems a bit obsessive sometimes.

Another month and another very long list of life events that need to be accounted for.

First and foremost, the most amazing thing happened to my wife and I on October 22nd. We became a parents to the cutest little baby boy around! As you might have guessed, a very large portion of my time has now been devoted to this little guy, putting modding and design on the back burner to him and my real job. Though I’m still ever persistent to get at least an hour or two of work done a day on my projects, it’s still quite the taxing endeavor sometimes. He’s actually sleeping right behind me down in my office as I write this. Sleep is hard to come by but when he konks out, I have a limited window to get stuff done which is why I’m posting now!

Evan Christopher Downing

Evan Christopher Downing

That was the big news.

The second big news is certainly modding related in that I am also a proud new owner of a FlashForge Dreamer 3D Printer which I just acquired a week ago. This completes the main trifecta of my work shop as I now have a full CAD, 3D Printing and CNC Milling capabilities in house.  This is already helping out greatly in a boat load of projects I’ve been working on and I’ve been working out the kinks to get full sized, quality prints from my new machine which I can then incorporate to the milling machine to make up for the short falls of 3D printing quality and the tolerances that have to be compensated for because of the precision of my CAD programs.

As far as the 3D printer itself goes, I’ve done a (long) unboxing video to show what one from the US might expect to find inside their package. Overall I’m happy with the machine so far, aside from some of it’s corner cutting when it comes to material and exterior construction, but hey it’s been printing reliably enough for the price and a lot of the failures I’ve had are just the early learning curve. Check out the video below if you’re so inclined to do so!

The FlashForge Dreamer 3D Printer

The FlashForge Dreamer 3D Printer

So what have I been up to these past few months? Well it’s been kind of a secret but lets just say that I’m working on trying to redefine what one could call a “hack” as far as making a portable gaming console goes. In an attempt to try and push the boundaries between what has been a traditional portable system to what I feel can be achieved, I’m getting closer to making this a physical demonstration. Since July I’ve been working on the design of a new portable project. This one is going to go where no portable has gone before and employ methods which combine all three of my in house processes along with custom PCBs and help from my good friend RDC.

IMAG1042

A test print of the front face bracket of my new project.


With all that said, the next couple of months are going to be quite fun to see where they lead. I’m pretty excited about where things are right now and there will be more updates in the near future!


Hey guys! Today I’d like to present to you my completed OUYA Portable!

This is my first portable in almost two years that I completed. I know I’ve done a lot of other stuff of course, but as far as technical “portables” go, this is my first since “The GeneBoy“. It’s amazing to see the difference two years makes in technique and quality, but it’s just a stepping stone into the next project, whatever that may be.

So with that said, having this off the table will allow me to get back on to finishing off the Cross Plane commission I need to finish.

If you want to check out the build log and how this was made, you see more here at the “BacMan” forums.

But thanks for checking it out! I’m happy with how this came out!